What’s it Like to do a Full RV Build?

What’s it Like to do a Full RV Build?

What’s it like to do a Full RV Build?

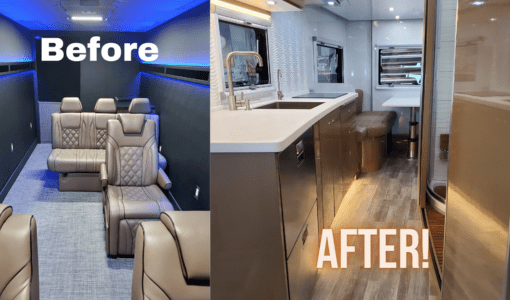
In a world where the open road beckons and the thirst for adventure runs deep, one man, James West, embarked on an extraordinary journey to create a modern custom-built RV for our clients in the music industry. Leaveil Degree is a member of the group The Whispers and Tracy Hazzard has been a back up singer for 8 time Grammy winner, Ziggy Marley since 2001. What started as a humble Kenworth Toro VIP party bus would soon be transformed into a state-of-the-art Super C motorhome, a testament to James’ unwavering determination and unparalleled craftsmanship and Leaveil’s love for modern luxury.

the beast before and after
the Beast owners

Humble Beginnings

It was a chance encounter that set James on this path he envisioned a canvas upon which he could paint his vision of the perfect motorhome. Without hesitation, James designed this unique RV in his head with no actual drawings his mind already racing with ideas and plans. The task ahead was daunting, but his passion for the project fueled his determination. He knew that turning this behemoth into a modern, luxurious motorhome would require an immense amount of time, effort, and skill. We had many, many design meetings with our clients along the way as they were always with us during the process. The Beast project took on a life of it’s own.  

the beast project
the beast project
Rv technician welding

The Transformation Begins

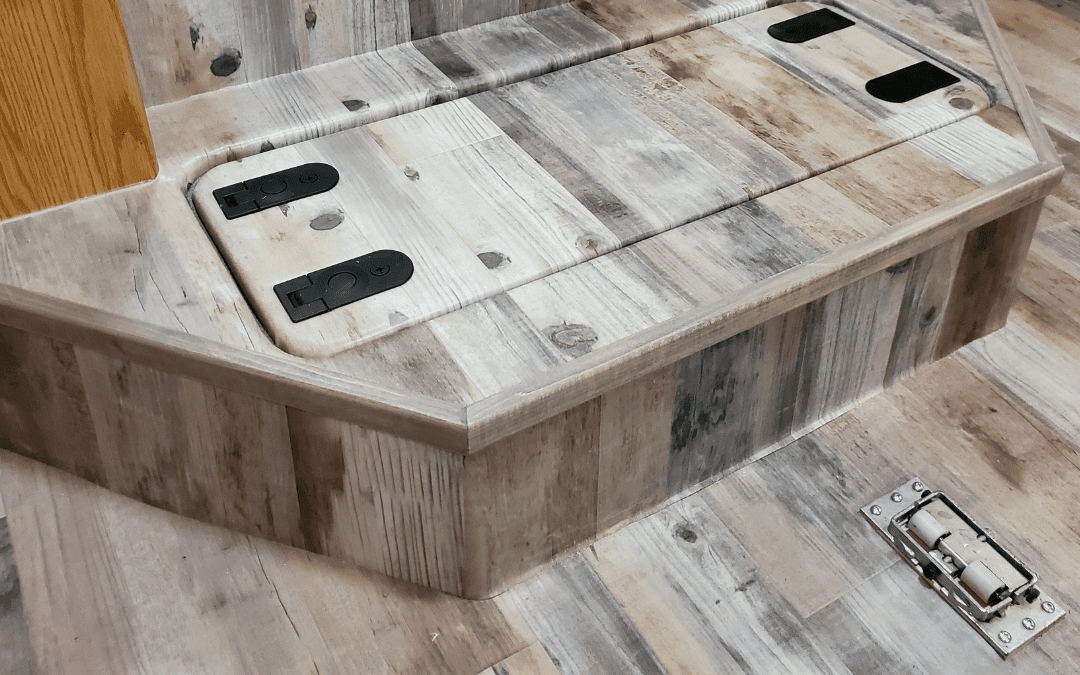
The first step in spring of 2021 was to strip the bus down to its bare bones. James meticulously removed every last trace of the party bus’s former life, from the basic decor of 8 vinyl luxury seats. This was no easy feat, as the bus had been customized to cater to its previous partying purpose. But James was undeterred, driven by the vision of what this vehicle could become. As the weeks turned into months, James poured his heart and soul into the project. He spent countless hours designing this special super C motorhome thinking of intricacies of custom fabrication, and honing his skills in areas he had never explored before. From electrical wiring to plumbing, James used his training of 18 trades of the RV industry determined to master every aspect of the transformation.

In this first photo we had to extend the back two feet as the bathroom is quite large. The second is installing 7 new windows and the third is a brand new custom-built slide-out. That’s right, we cut two gigantic holes into a perfectly fine coach and metal fabricated it to our client’s wants and needs. We knew early on that to be comfortable the back needed to be longer and the reclining sofa needed more space to watch TV.

rv kitchen reno
custom rv kitchen
the beast project

Overcoming Challenges

The journey was not without its challenges, however. James encountered numerous roadblocks and setbacks that threatened to derail his ambitious plan. The sheer size of the Kenworth rig that is 7 x 20 feet that posed logistical hurdles, as he struggled to find lengthen the rear by 2 feet and build an entire slide-out out of steel. Additionally, the costs of the project quickly escalated, testing our clients financial resources and forcing him to get creative with his budgeting. But James refused to be deterred. He drew upon his unwavering determination and problem-solving skills to overcome each obstacle. When he encountered a problem he couldn’t solve on his own, he sought out the expertise of an electrical engineer specializing in RV customizations, forging valuable partnerships that helped him navigate the complexities of the transformation afterall, a team was not building this build, just James did everything from beginning to end. We hired our close friend Brad to help with some more complicated aspects and James’ wife Teri helped and handed tools as best she could.

The Stunning Reveal

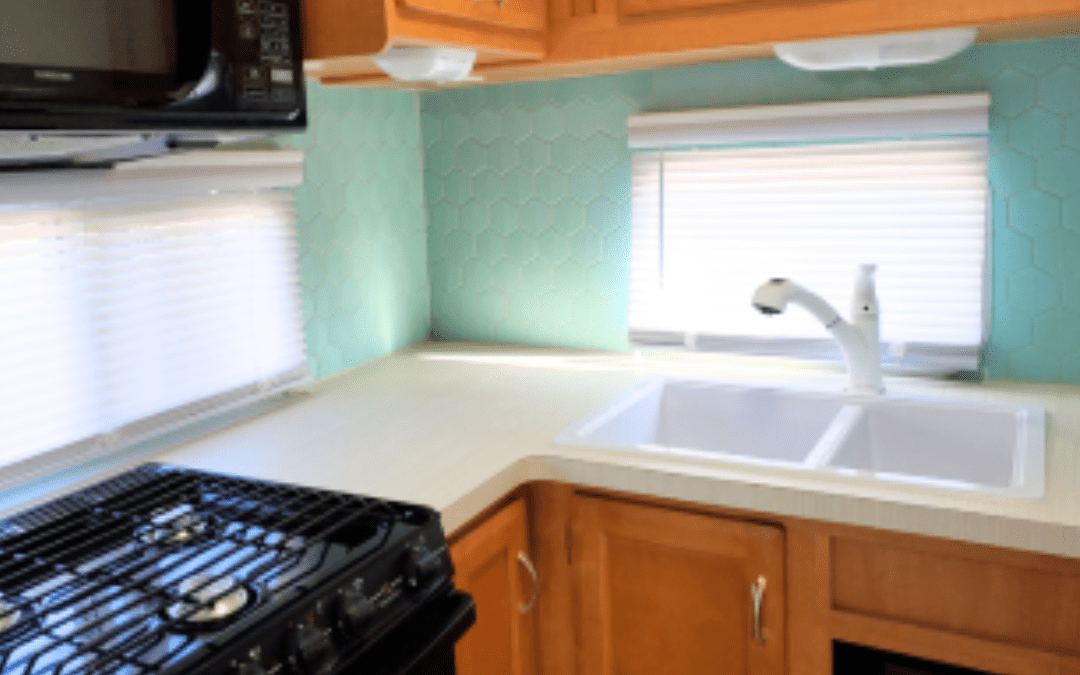
After two years of tireless work, the moment of truth had arrived. James stood back and admired his creation, a true masterpiece of engineering and design. The once-humble Kenworth VIP bus had been transformed into a stunning Super C motorhome, a testament to his vision and craftsmanship. The exterior of the vehicle was a sleek and modern marvel, with a custom paint job that seamlessly blended the rugged Kenworth chassis with the elegant lines of a luxury motorhome. The interior was a true feast for the senses, with high-end finishes, state-of-the-art appliances, and a layout that maximized both comfort and functionality.

the beast project
James west
rv kitchen interior
the beast project bathroom
the beast project kitchen
rv bathroom
the beast program kitchen
the beast project kitchen
the beast project

Our 30 minute video of the completed Beast project  

Contact us at 702-743-0347 if you’d like your RV renovated. We’re located in Las Vegas, NV  

RV Flooring

RV Flooring

Revamping Your RV’s Interior:

A Guide to Replacing RV Flooring


As the owner of Ace of Spades Custom RV and Repair in Las Vegas, I’ve helped countless RV owners transform the look and feel of their homes on wheels by replacing the flooring. One of the most impactful upgrades you can make is swapping out that old, worn carpet or linoleum for a fresh, modern flooring solution. In this blog post, I’ll walk you through the process of selecting the right flooring, creating a template, cutting the material, and properly installing it in your RV.

Choosing the Perfect Flooring for Your RV


When it comes to RV flooring, not all materials are created equal. After years of experience, I’ve found that cushion-backed vinyl flooring is the ideal choice for motorhomes and travel trailers. Here’s why:

Durability: RVs experience a lot of foot traffic and can be subjected to spills, dirt, and other wear and tear. Cushion-backed vinyl are incredibly durable and can withstand the rigors of the RV lifestyle. They won’t easily scratch, dent, or fade, ensuring your floors look great for years to come.

Waterproof: One of the biggest advantages of vinyl flooring is its water-resistant properties. This is crucial in an RV, where you may encounter spills, leaks, or even the occasional flood from a malfunctioning appliance. Cushion-backed vinyl will protect your subfloor and prevent water damage.

Comfort: The cushioned backing on this flooring provides a softer, more comfortable feel underfoot compared to traditional vinyl or laminate flooring. This can make a big difference in the overall comfort of your RV, especially if you spend a lot of time on your feet.

Easy Installation: Cushion-backed vinyl is designed to be quite flexable that makes it relatively easy to install, even for DIY-ers. This can save you a significant amount of time and money compared to hiring a professional.

When selecting your vinyl flooring, be sure to choose a product specifically designed for RV use. They are typically thinner and more flexible than their residential counterparts, allowing them to better accommodate the unique subfloor conditions and movements of an RV.

Creating a Floorplan Template 


Before you can start cutting and installing your new flooring, you’ll need to create a detailed template of your RV’s floor plan. This will ensure a seamless and efficient installation process. Start by thoroughly measuring the length and width of each room or area in your RV. Be sure to measure at multiple points, as RV floors can sometimes be uneven or have slight variations in size. Record these measurements carefully, as they will be the foundation for your template. Next, use a large sheet of cardboard or a roll of paper to place in the exact area of the RV’s floor plan. Tape the cardboard paper together with the layout of the rooms, including the placement of any fixed furniture, appliances, or other obstacles. This will help you visualize how the flooring will need to be cut and installed around these elements. As you’re creating your template, be sure to mark the location of any vents, plumbing pipes, or other features that will need to be accommodated during the installation process. This will save you time and ensure a professional-looking finish.

Cutting the Flooring to Fit


With your detailed template in hand, you’re ready to start cutting the vinyl flooring to fit your RV’s unique layout. Here are a few tips to ensure a seamless and accurate cut:

Measure Twice, Cut Once: Before making any cuts, double-check your measurements and the fit of the vinly against your template. It’s better to take a few extra minutes to ensure a perfect fit than to waste valuable material.

Use the Right Tools: Invest in a sharp utility knife or a specialized vinyl cutter to make clean, straight cuts. Avoid using sissors, as this can create jagged edges and uneven lines.

Plan for Expansion: When cutting the vinly, be sure not to leave a small gap between the edges of the flooring and the walls or fixed furniture. This will allow the flooring to expand and contract with changes in temperature and humidity without buckling or warping.

Get Creative with Cuts: Navigating around obstacles like vents, pipes, and curved walls may require some creative cutting techniques. Use a jigsaw or a utility knife to carefully trim the vinyl to fit these unique shapes and spaces.

Gluing It All Together


With your flooring cut to size, it’s time to start the installation process. Cushion-backed vinyl is typically installed using a full-spread adhesive, which provides a secure and long-lasting bond. Begin by thoroughly cleaning the subfloor to remove any dirt, staples, or old adhesive residue. This will ensure the new flooring adheres properly. Next, apply the adhesive to the subfloor using a paint roller, following the manufacturer’s instructions for coverage and drying time.

Carefully place the flooring in the corner of the room, making sure it’s aligned with the wall and leaving no expansion gap. Use a roller to firmly press the vinyl into the adhesive, ensuring a tight, secure fit. Continue laying the vinyl working your way across the RV. Remember to make sure there are no expansion gaps and use a utility knife to make any necessary cuts around obstacles.

Apply firm pressure to each area to ensure a strong bond with the adhesive. Once the entire floor is installed, allow the adhesive to fully cure according to the manufacturer’s recommendations, typically 24-48 hours. During this time, avoid walking on the new flooring as much as possible.

The Finishing Touches


With the new flooring in place, you can now turn your attention to the finishing touches. Reinstall any trim or molding pieces, being careful not to damage the new flooring. You may also want to consider adding transition strips or trim pieces to create a polished, professional look at the edges of the flooring.

Finally, take a step back and admire your handiwork! By replacing your RV’s old, worn flooring with a durable, comfortable, and visually appealing cushion-backed vinyl system, you’ve transformed the entire look and feel of your home on wheels. Enjoy your newly refreshed RV and all the adventures that lie ahead!

Please contact us if you’d rather we professionally installed your RV flooring for you. Call us at 702-743-0347 in Las Vegas.

rv flooring
rv flooring
rv flooring

RV renovations RV customization rv services

How Can I make my Camper look Better?

How Can I make my Camper look Better?

How can I make my camper look better?


Transforming Your Camper, Motorhome, or Travel Trailer: A DIY Guide to Elevating Your Ride


How can I make my camper look better? Are you the proud owner of a camper, motorhome, or travel trailer, but feeling like it’s time for a refresh? As a fellow DIY enthusiast, I’m here to share my tips and tricks on how you can transform your standard recreational vehicle into a true oasis on the open road.

Get ready to unleash your inner designer and make your camper feel like a custom-built retreat!


Revamping the Kitchen

The kitchen is the heart of any camper, so let’s start there. One of the easiest and most impactful upgrades you can make is swapping out those dated, worn-out countertops. Opt for a sleek, durable laminate or even a beautiful butcher block surface. Not only will it instantly elevate the look, but it’ll also provide a more functional workspace for all your culinary adventures.

Next, consider upgrading your appliances. If your fridge is on its last legs, look into a compact, energy-efficient model that’ll keep your snacks and drinks chilled to perfection. And don’t forget about the stove – a modern, two-burner cooktop can make meal prep a breeze, especially if you add a fold-out extension for extra counter space.

While you’re at it, why not spruce up those tired old cabinets? A fresh coat of paint or even new cabinet doors can work wonders. And don’t forget to add some stylish hardware to really make them pop. There are thousands of different handles on amazon. We also recommend a new sink with new faucets.

Revitalizing the Sleeping Area

Now, let’s turn our attention to the sleeping quarters. If your mattress is past its prime, consider investing in a high-quality, memory foam replacement. Trust me, your back will thank you after a long day of exploring.

And don’t forget to add some cozy bedding – think plush, microfiber sheets and a warm, yet breathable comforter.

Another great way to upgrade the sleeping area is by adding some custom storage solutions. Install shelves or cubbies above the bed to keep your essentials within reach, and consider adding under-bed storage for all those bulky items. I highly recommend adding USB ports.

If your camper has a dinette that converts into a bed, you can give it a fresh look by reupholstering the cushions. Choose a durable, stain-resistant fabric that complements your overall design scheme.


Refreshing the Bathroom

The bathroom may be the smallest space in your camper, but it’s no less important. Start by giving those tired old walls a fresh coat of paint or even some peel-and-stick wallpaper for a quick, budget-friendly update.

Next, consider upgrading your vanity and sink. A sleek, modern vessel sink can instantly elevate the look, and you can even find compact models that won’t take up too much precious space.

Don’t forget about the shower! If your current setup is feeling a bit lackluster, look into installing a new showerhead or even a rainfall-style fixture for a truly spa-like experience. We have even installed residential showers or spraying brass hardware silver. 

And let’s not forget the all-important toilet. If yours is used or on its last legs, consider upgrading to a new one. These are around $250 and may be a more efficient, water-saving model. Trust me, your wallet and the environment will thank you.


Revamping the Flooring

Moving on to the floor, this is another area where you can make a big impact. If your current flooring is looking worn or outdated, consider replacing it with a durable, easy-to-clean option like cushion backed vinyl flooring. It’s is a fantastic choice for campers, as it’s waterproof, scratch-resistant, and incredibly easy to install. If your camper is quite large with lots of nooks and crannies its best to hire an RV customizer like Ace of Spades Custom RV and Repair here in Las Vegas. I have another post on how to install flooring.

Plus, you can find a wide variety of patterns and colors to suit your personal style. Some people do peel-and-stick tiles themselves which is another option as they’re budget-friendly and can be easily removed if you ever want to change things up.

Just be sure to thoroughly clean and prepare the surface before installation for the best results.


Upgrading Appliances and Power Systems

Now, let’s talk about the nitty-gritty of your camper’s systems. If your appliances are starting to show their age, it might be time for an upgrade.

Look into energy-efficient models that’ll save you money on your power usage and keep your space comfortable.

For example, consider swapping out your old air conditioner for a modern, smaller system. Some people get a multi-split system as these units are incredibly efficient and can even provide heating in colder months.

And don’t forget about your water heater – a tankless model can save you space and provide endless hot water on demand.

Of course, no camper renovation is complete without addressing the power situation. If you’re still relying on a traditional generator, it might be time to explore the world of solar power.

Installing a high-quality solar panel system can not only reduce your carbon footprint but also provide a reliable, silent source of electricity for all your needs.

Pair your solar panels with a robust battery bank and a powerful inverter, and you’ll have a self-sustaining power system that’ll keep your lights on, your devices charged, and your appliances running, no matter where the road takes you.


Personalizing Your Space

Finally, let’s talk about the fun part – personalizing your camper to truly make it your own.

Start by adding some cozy, textured elements like throw pillows, plush rugs, and redoing the curtains.

These small touches can instantly transform the ambiance and make your space feel more like a home.

Don’t be afraid to get creative with your decor, either. Hang some wall art, install floating shelves for your knickknacks, or even add a small, decorative chandelier for a touch of elegance.

And let’s not forget about the outdoor living space. If your camper has an awning, consider adding some string lights or even a small, portable TV for movie nights under the stars.

You can also add some comfortable outdoor furniture, like a couple of folding chairs or a small side table, to create a cozy lounge area.

Remember, the key to a successful camper renovation is to have fun and let your personality shine through.

Don’t be afraid to experiment and try new things – after all, the open road is your canvas, and your camper is the masterpiece you get to create.

So, what are you waiting for? Grab your tools, unleash your inner designer, and get ready to transform your camper into the ultimate home-on-wheels. Happy renovating!

If you need professional help with refreshing your RV or camper call us at Ace of Spades Custom RV and Repair in Las Vegas at 702-743-0347

rv bedroom
rv bar table
Rv bathroom